|
Splitting axes are used for breaking the wood apart into smaller pieces by splitting apart the wood fibers. Whereas, felling axes are used to fell the vast trees and cut through the wood fibers. Interchanging the use of these axes for the purposes would leave you in a lot of frustration and hair-pulling moments. Apart from splitting axes, mauls are also used to divide the wood into smaller pieces for obtaining firewood. So we’re going to make a thorough comparison between the two in our review of splitting axe vs maul. Our VerdictAfter the thorough comparisons and weighing out the pros and cons of both splitting axe and maul, we’ve come to the following conclusions: If you want to split wood enough for an occasional fire, then axe is the best option for you as it is a multi-purpose and a lightweight tool, used for various other chores as well. But if you want to split a lot of large-sized wood for firewood purposes, then go for the maul as its heavyweight will give you extra power, and your work will be done in less time. Splitting Axe Vs Maul: Comparison Chart
Splitting AxeA splitting axe is a multi-purpose tool, but it is mainly used for chopping and splitting wood. Its blade is thin and sharp, which easily cuts through the forest and breaks the wood fibers apart. They’re not too heavy and are relatively easy to work with for more extended periods without getting tired and facing muscle fatigue. Axe handles are made either of wood or composite material. You can select the handle type, which is preferable to your grip. The axe handles are generally short so that they can be used for a lot of chores. The handle can be measured up against your arm length. If the stem is shorter or equal to your arm length, then it’s an axe. MaulA maul is a massive sledgehammer with a pointed axe head. Maul is used only for the specific purpose of splitting wood. It has no other use besides this. Its blade is fat and blunt, which offers more force for cutting wood than an axe. Since a maul is more massive than an axe, it requires more strength to work with. Splitting wood with a maul will leave you tired and exhausted. The maul has a handle that is longer than the ax’s handle. If you measure the handle against your arm length and the handle comes out to be longer, then the tool is a maul; this is the standard way of differentiating between the axe and maul when their blades are rusted and cannot be distinguished easily. The handle of the maul is made up of wood and composite materials as well. Usually, you’ll find maul with handles made up of fiberglass, plastic, or hard hickory. These materials provide better support to the massive head. The weight and the design of the maul are such that it’ll prevent you from injuries and split the wood in a single swing. Splitting Axe Vs Maul: Similarities
Splitting Axe Vs Maul: Differences
Splitting Axe Vs Maul: FeaturesFeatures Of Splitting Axe
Features Of Maul
Splitting Axe Vs Maul: Pros And ConsPros And Cons Of Splitting Axe
Things We Like
Things We Don't Like
Overview Of Splitting Axe
Things We Like
Things We Don't Like
ConclusionAfter weighing all the pros and cons and knowing the proper functionality of both the tools, we have concluded that what tool is best for you for splitting wood is up to your need. If you want a workable amount of wood and a device that serves all your purposes besides splitting wood, should be lightweight, easy to use, and should not make you feel tired after continuous use for long durations, then you should opt for splitting axes. If you want a relatively large amount of wood for firewood and a tool which splits wood in a single swing, accelerates your work and breaks a large amount of wood in less time, but requires more force and can make you feel tired, won’t serve any other purpose except for wood splitting and will be massive as well, then go for a maul. Via http://thehemloft.com/splitting-axe-vs-maul/
0 Comments
An additive is significant to the soil. They improve the growing environment of the soil. Perlite and vermiculite are the most popular additives. But many of us get confused between them. It is essential to know about them. They have a lot of differences and uses. So after various tests, we have come with a comparison between Perlite Vs Vermiculite. Our VerdictThe plants and the needs of the user will help the user decide. They both are perfect additives. There is never a winner between them. They both have their unique purposes. Perlite is very good for clayey soils. They are even perfect for improving aeration in the soil. When the user needs to change pots, perlite is the best to use. There are even different grades of perlite. They can even reduce changes in soil temperatures. Vermiculite is very good at keeping the plants moist. It won’t break down in the soil. They can increase the strength of the seedlings. They can even help in holding water for a longer time. Now let’s get deeper to the subject and make our comparisons. Perlite Vs Vermiculite: Comparison Chart
Perlite Vs Vermiculite: Differences1. StructurePerlite looks like white granules. They are odorless. They even look more like small plastic balls. They are white and have sharp edges. They are porous too. They have a harder body. Vermiculite is shinier than the latter. They are golden brown. They are clean and odorless. They are softer than perlite. Bottom Line: Perlite and vermiculite have a different structure. 2. FormationBoth of them come from rocks. Perlite comes from volcanic rocks. The rocks get crushed until they explode. Then they transform into small pieces. They have silica and some water molecules inside them. There is even a pearly shine on the rock’s surface. Vermiculite has different varieties of minerals. They come from ores that have silica, magnesium oxide, and alumina. They formed shapes of worms when Mr. Thomas Webb found it. Thus he named it from the “vermiculite,” which is a worm in Italy. Bottom Line: Both of them form from different sources. 3. Water-Holding CapacityThe vermiculite is relatively softer than perlite. These soft particles can soak up water. They absorb the water. This is very good for plants that need moist soil. Perlite stores water by holding it in the bubbles. They do not absorb the water like the latter. This makes water drain away from the spaces faster. Bottom Line: Vermiculite has a way better water-retaining capacity. They can hold water much more than perlite. 4. AerationBoth of them as additives improve the aeration of the soil. They contain the spaces to let in oxygen. Vermiculite has medium air porosity. They can offer more water and less aeration. They can provide spaces for air but not as much as perlite. Perlite has very high air porosity. They have more spaces between the particles, which gives space for air. There are three different grades of perlite. They are medium, coarse, and fine. The coarse grade perlite has the best air porosity. They are even perfect for a plant that needs excellent drainage. Bottom Line: Perlite provides more aeration than vermiculite. 5. pHSoil pH is significant. Perlite is a bit alkaline. Perlite does not contribute much to pH buffering. Vermiculite is much neutral. They have a high capacity in pH buffering. Bottom Line: The pH factor is different in both. It should be a factor to consider before choosing the additive. Perlite Vs Vermiculite: Similarities
Features Of PerlitePerlite is clean and sterile. They contain about 6 percent of water. They can loosen the heavy soil. The volcanic rocks get heated to puff up into white balls. The hidden nooks hold the water and air on the surface. They help the soil to dry out completely between watering. The porous nature allows excess water to drain away faster. They contribute no chemical to the soil. They have a neutral pH level. They have a pH of 6.6 to 7.5. The most prominent feature of perlite is aeration. It can improve the aeration of the soil and can give them better drainage too. They can even increase the amount of oxygen access for the roots. The space between the particles helps to trap the air. They are even used as protective coatings. Pelleted seeds are a good example where perlite acts as a protective coating. They won’t mold or rot. The lightweight makes them float on the top of potted plants. They even have low nutrient retention ratings. It doesn’t hold much water but can boost the humidity. Features Of VermiculiteVermiculite is a mineral product and gets mined out of the ground. It composes of magnesium-aluminum-iron silicate. They increase the water retention of the plant. The layers help in trapping water. This makes it perfect to act as an anti-caking agent in fertilizers. They help in loosening the heavy soil. They help the soil to stay damp and never let them dry out. They interact with the calcium and potassium in the soil. They have a pH of 7. They can help in raising the pH by a minimal amount. The most significant advantage of vermiculite is the water holding capacity. They absorb more water. They can absorb four times their volume when water is added. They act like a sponge and absorb water. They don’t aerate the soil like perlite. They can keep the moisture and plant nutrients. Water-loving plants will love the addition of vermiculite. They can help them stay moist always. Some Top Perlite Brands1. Espoma PR8 8-Quart Organic Perlite
Espoma PR8 8-Quart Organic Perlite
They are 100 percent natural and are very apt for organic gardening. They help in preventing compaction. They are one of the best in the market. 2. Hoffman 16504 Horticultural Perlite
Hoffman 16504 Horticultural Perlite
They are 18 quarts and is an American product. They are of premium quality and very good for horticulture. They could even help in building soil fewer mixes. Some Top Vermiculite Brands1. 8QT Professional Grade Vermiculite
8QT Professional Grade Vermiculite
They are very efficient and popular. They are 8 quarts. They are a “good earth” horticultural vermiculite. They can propagate cuttings and store bulbs too. 2. Espoma Organic Vermiculite
Espoma Organic Vermiculite
They are a 100 percent natural vermiculite. They are perfect for improving heavy soils. They are 8 quarts. They can enhance the aeration of the soil. They are the best choice for organic gardening. FAQs1. Can we reuse perlite?Yes, it is possible to reuse perlite. They don’t hold nutrients and do not decompose too. The bleach solution can be used to sterilize the perlite. This may improve the sterility if it’s a problem. Other than that, clearing the plant bits will make the perlite reusable. 2. Is vermiculite dangerous to the soil?They are very safe to use. There are many rumors which say vermiculite contains asbestos. But they are not a type of asbestos. This was due to a mine in Montana, which contaminated vermiculite with asbestos. But various tests later proved they are free from asbestos. They are entirely harmless to the soil. 3. Is perlite a type of Styrofoam?This is also a prevalent rumor among the people. The only similarity which they have is the looks. Perlite is from volcanic rocks, which are then crushed into pieces. They have a high composition of silica. Styrofoam composes polystyrene. Disposable plates and cups have styrofoam. 4. Why does vermiculite lead plants like cacti to death?Vermiculite is perfect for plants that need more water. They can hold water and drain it too when filled. They give correct amounts of moisture to the plant. The amount of water stored is too much for some plants. Plants like cacti need well-draining soil. When vermiculite gets used in these plants, they may rot or die. 5. Why is perlite very good for clayey soil?Perlite increases the drainage and aeration of the soil. This will help to change the clayey soil. Spreading a layer of perlite on the top will boost the soil. But the mixing of perlite should be with already loosened soil. ConclusionPerlite and vermiculite are never the same. They both have many differences and are very useful for the soil. Even though they share many similar qualities, they have different uses. If not used for the proper plant, they may disturb the growth of the plant. Perlite has a slightly alkaline nature. They don’t hold water for very long but can maintain humidity. Their chief use is improving the aeration of the soil. They are also a perfect choice for plants that need to drain out faster. Vermiculite is neutral and is best for plants that love water. They can absorb water more but don’t aerate much. They are better to start the seeds because of the protection they provide. They can hold moisture for more time too. These additives are vital for the plants. Choosing the right additive will improve the strength and growth of your plant. I hope your dilemma between perlite and vermiculite is now over. Via http://thehemloft.com/perlite-vs-vermiculite/ Many people have problems in choosing the right chemical finishes. The two most famous ones are polyacrylic and polyurethane. After different tests and lot research, we are here to help you find the right finish to your woods. Let’s compare Polycrylic vs Polyurethane. Our VerdictBoth of them are very important for finishing the wood pieces. People who use different types of wood for building various things can use both. If the user needs to finish his interior pieces, polyacrylic is the better choice. They give a coat to the surface, which can dry very fast too. They are very affordable. Polyurethane is a better choice for the finished and unfinished wood. They are very durable too. They can protect the wood from scratches better than polyacrylic. Both materials are useful for different projects. Let’s find out more about these products. Polycrylic Vs Polyurethane: Comparison ChartHere is the table which compares the main features between polyacrylic and polyurethane.
Polycrylic Vs Polyurethane: Differences1. PricePolycrylic is more affordable than many other finishes in the market as they are water-based. This makes them cheaper and easier to make too. It is available in liquid aerosol cans and sprays. Polyurethane is a bit expensive than the latter. The oil-based ones may need more money in preparation. They aren’t as affordable as polyacrylic. Bottom Line: Polycrylic is cheaper and available in stores everywhere. 2. Cleaning Up The WoodCleaning of the finish makes it look better. Polycrylic needs soap and warm water to clean the surface. This can give them a beautiful finish. This is not the same for oil-based polyurethanes. They need a mineral spirit to get cleaned. Water-based polyurethanes need soap and warm water. Bottom Line: Polycrylic is easier to clean up with soap and warm water. 3. ColorThe polyacrylic has a milky white appearance. They dry crystal clear if applied right. If the user applies too much to the wood, it may give a milky look. Polyurethane has a different color. The water-based one is almost in the color of polyacrylic. The oil-based one has a yellowish tint. They can get yellow as time passes. They can make light wood look dull. Bottom Line: Both of them have different colors, but polycrylic doesn’t affect the wood much. 4. Safety In WorkPolycrylic doesn’t have any danger and can keep a smooth working environment. They are not combustible and have fewer VOCs. VOC stands for volatile organic compounds. They do not have a potent smell too. This is not the case in polyurethanes. They are more dangerous to work with. They are combustible and have a lot of VOCs. A well- ventilated area and respirator is critical while using them. They have a powerful and persisting smell too. That is a reason why workers leave the windows open for extended hours after using them. It is a toxic and flammable finish. Bottom Line: Polycrylic is a bit safer than polyurethane to work with. 5. Time To DryTime might be an essential factor for many workers. Polyurethane may take more time to dry. Even after it dries, the curing process takes more time. Polycrylic is opposite to its competitor in this feature. It takes very little time to dry. Bottom Line: If your work is very time efficient, it is better to prefer polyacrylic. 6. The Final FinishPolycrylic gives a transparent finish, but this is not true in all cases. If the user applies more thick coats to the surface, it can result in a milky finish. This is more common in dark-colored projects. In polyurethane, they add a warm glow to dark woods. But they can make light wood look dull. They even tend to get yellow with age. Bottom Line: Both coats can give different finishes to different types of woods. 7. DurabilityEven though polyurethane takes more time to dry up, but after drying up, they give a robust shell over the material. This is very durable and hard. They can even prevent the materials from scratches. This makes the finish long-lasting too. The polyacrylic also gives a neat finish. But they aren’t as durable as polyurethane. Bottom Line: Polyurethane gives a durable and robust finish. 8. VersatilityPolycrylic takes very little time to dry. But the consistency of it makes them very tough to apply in larger surfaces. Polycrylic is handy for softwood. Polyurethane is very versatile. It can finish both finished and unfinished wood. They are convenient for all types of wood. The slow drying nature makes it apt for large surfaces. The user need not worry about some sections drying before the finish of the entire piece. This may make the appearance terrible and inconsistent. Bottom Line: Polyurethane is more versatile than polyacrylic. Polycrylic Vs Polyurethane: SimilaritiesPolyurethane and polyacrylic are protective coats used for wood. They add shine to the wood. The oil-based polyurethane and polyacrylic may have many differences between them. But there are few similarities too. 1. Water-Based PolyurethaneBut the water-based polyurethane is the same as polyacrylic. They dry fast like polyacrylic. Soap and warm water are enough to clean them up. They dry clear and give a transparent finish. These are some similarities between polyurethane and polyacrylic. 2. Protective MaterialsProtective equipment is essential while using these coats. The VOC in the coats may cause many health risks. Even though polycrylic doesn’t give strong odor, it’s better to use protective equipment. Sometimes it’s better to use respirators while using polycrylic too. Make sure you never shake liquid polyurethane. This may bring bubbles that may be on the brush. 3. UsageThe user can either spray or brush both the products. The runnier consistency of polyacrylic might give the user some tough time. The user has to be careful and apply thin coats. The user should also watch out for drips. A small mistake can give sticky finishes. This may be a problem for larger surfaces too. This is because they dry very fast. They have a runny consistency and need three good coats to get finished. Polyurethane is better for larger surfaces. Even though they take more time to dry, they give a more challenging and durable finish. They also need many coats. Before the next coats, dust should get sanded from the material. It may cause problems. Both products have some pros and cons. The user should identify which is better for his need. 4. SheensSheens is the level of glossiness. The different gloss levels tell the shine they produce. A higher gloss level gives more shine, and a lower level provides lesser shine. The gloss has the highest level, and matte has the lowest level. Semi-gloss and satin come between them. Polycrylic and polyurethane are available at all levels except semi-gloss. They are even available in matte finishes. Polycrylic Vs Polyurethane: Technical FeaturesFeatures Of PolyacrylicPolycrylic is a water-based finish made by Minwax. They dry very quickly and give a transparent finish. They are very affordable. Objects like tables and chairs get finished by polyacrylic. People who work with wood rarely prefer polyacrylic. This is because of the less time it takes to dry. They also have many other applications. They do not change the appearance of the stain much. They do not enhance the shine like polyurethane but can add beauty to interior works. People working with furniture prefer polycrylic for faster work. The user can apply polyacrylic with a spray bottle or roller. This gives the user a choice and can help them reach the corners. Light wooden surfaces need proper finishes without damaging their appearance. That is the reason why people prefer polycrylic for light wooden surfaces. They give a transparent finish with no tint. They have a chemical structure that allows polyacrylic to protect from water. They have compounds made from molecules of acrylic and methacrylic acid. They are one of the best water-based stains in the market. Cleaning up them is not a challenging process too. It needs soap and warm water to clean them up. They have a more runny consistency. This can give the user a bit of trouble while working with large and vertical surfaces. They do not have a strong odor like polyurethane. They are also not combustible and have fewer VOCs. Polycrylic is available in high gloss and satin. They are also available in a matte finish. Three coats pf polyclinic are perfect for a standard finish. Features Of PolyurethaneSometimes your wood may need hard finishes for extra protection. Polyurethane is a challenging and abrasion-resistant coating. They are a very protective top coating. They give a shiny finish to the wood too. Polyurethane is a polymer that contains alcohol and histamine. They form urethane bonds. Polyols and isocyanates react with a catalyst to produce polyurethane. These compounds help the wood get a rigid finish. They are perfect for wood pieces that get exposed to heat and moisture. They need durable and hard coatings. Polyurethane is ideal for this as they give a good hard finish. They are very durable and long-lasting too. They are available in two different forms. They are oil-based polyurethane and water-based polyurethane. The water-based is less toxic and more like polyacrylic. They dry quicker and have less strong odor too. They contain less VOC than the oil-based polyurethanes. Water-based polyurethanes are apt for side tables, shelves, and frames. Oil-based polyurethanes are the standard polyurethanes. They do not dry fast and are combustible too. They contain more VOCs, which may be harmful. Respirators are very important while using polyurethane. They are very durable and apt for hard finishes. This can help them handle extreme conditions. Even if the coat takes a longer time to dry, they form a robust shell. They have properties like melted plastic. The shine also gets more challenging due to the compounds present in them. The finish is also scratch proof. Oil-based polyurethane is suitable for hardwood flooring and big tables. They are perfect for wet surfaces. Steps To Apply PolyacrylicHere are a few steps to help you finish your wood with polyacrylic. They don’t need a lot of time. Total Time: 45 Minutes Step 1Make sure the surface is dry. It should be free from wax, grease, or any other unwanted materials. Step 2The surface must not be irregular. Sand it to get a smooth and uniform surface. It would give a better appearance at the end. If needed, apply stains. But whatever you do, make sure it dries completely. Step 3Stir well before using polyacrylic. If you are using the spray, do not shake it too much. Step 4Apply a skinny coat over your material. Make sure your brush is high quality and synthetic. Bristle brushes are the right choice. Step 5Leave it to dry for 2-3 hours. Sand the surface with fantastic sandpaper for a uniform finish. Try removing all the dust around the surface. Never use the steel wool for sanding. Step 6Apply a second coat after doing the above step without any mistakes. Then again, follow the above step. Step 7Give a final coat for a better finish. Three coats will be good for a standard finish. Leave it for a day, and your material is ready to use. Steps To Apply PolyurethaneStep 1Check the surface for any irregularities. Make sure to remove all the dust with a cloth. Step 2If needed, stain the surface. But make sure the surface is clean and dry before staining. Step 3Start dipping your brush in polyurethane and make sure to make long strokes. Overlap each pass until the surface gets coated completely. If there are any drips, smooth them into the surface with the brush. Wait for a few mins and check for drips. Leave it to dry. Step 4Another two undiluted polyurethane coats are preferable. Do not wipe the brush in the rims, as this may result in air bubbles. Spread the coats in the same way as the first coat. Try to get a nice coat without dry spots. Step 5Overlap your coats for better results. Follow the same steps for the third coat also. Leave it to dry. Step 6After it dries, check for drips and cut them off. Wet sanding could remove blemishes if there are any. Step 7After this dries and it’s uniform all over the surface, give a final coat. Remember to leave adequate time for the surface to dry between each coat. Polycrylic Vs Polyurethane: Pros & ConsPolycrylic
Things We Like
Things We Don't Like
Polyurethane
Things We Like
Things We Don't Like
FAQs1. Which is the best for flooring?Flooring needs a very durable finish. This is because it gets used the most in a house, and the user can’t be working on it often. Polyurethane is better in this case. It can give a durable and robust coating, which can last for a long time. It can also withstand the exposure of water and moisture. 2. Can we use steel wool instead of sandpaper for sanding the surface?The steel wall is not a preferable choice. Steel wool and water could result in rust. So, it’s better to avoid steel wool near any water based wood finishing products. This may leave a stain on the surface. It’s better to use the #220 sandpaper for neater results. 3. Is foam brushes preferable for applying polyurethane or polyacrylic?The foam brush has a blade instead of bristles. It may even start dissolving as the user brushes on stains and mineral spirit finishes. There must be a smooth coat of finish on the surface. The foam brush also contains air, which may result in air bubbles. The foam brush is not as good as the bristle one for this activity. ConclusionThe wood sealers like polyacrylic and polyurethane are very important for wood projects. They can make it last for a longer time and protect it too. Before choosing the best between the two, the user must find his needs and choose according to it. Polycrylic is a better choice for interior works such as tables. It takes very little time to dry and is very cheap too. If your project is very time efficient, they are the best choice. They do not have many dangers while using them. Polyurethane gives high quality and robust finish. It is very durable and versatile. It can withstand heat and moisture. But it may take more time to dry and may be dangerous. We hope you have made your choice. Thank you for reading our review. Via http://thehemloft.com/polycrylic-vs-polyurethane/ What if you are a woodworker looking to finish your project? What will be your choice? Danish or Tung oil? What if you are a novice user and have no idea about both? Well, let’s make it easy for you. Here, we have compared Danish Oil vs Tung Oil for you. Our VerdictTo choose the best one among these two is different. If you need excellent protection and do not want to put in too much effort, Danish oil is for you. Danish oil is the winner. It dries faster, easy to use. It leaves a satin finish, and you can use it on any wood surface. It has excellent penetration power and excellent water resistance. But if you a hardcore fan of the perfect golden finish offered by tung oil, then choose that. It is hard to apply, dries slower, and needs many coats. It is food safe and adds to the appeal a lot. It offers better protection to the wood. But the time and effort make it less appealing. Also, the finish makes you wonder it is worth it. Often it is worth it. Danish Oil Vs Tung Oil: Comparison Chart
Danish Oil Vs Tung Oil: Differences1. FinishDanish oil provides a water-resistant satin finish. It is a hard-wearing, long oil finish. It does not add any color to the wood while penetrating the wood. It keeps the wood texture as such it is. Over the years also it does not fade. This often gives a far better appeal to buys who do not want regular maintenance. Tung oil provides a challenging, clear, in-depth look at your woodwork. It gives a water-impermeable coat over the surface. But that advantage is overshadowed by the need for regular maintenance. Also, it needs a longer drying time. Bottom Line: Tung Oil Wins 2. Number Of Coats NeededDanish oil is easy to apply, and it only needs up to 3 coats. This is a considerable difference as Tung oil needs six or more. Twice than that of Danish oil. The time required for tung oil to dry is very high too. It takes more than 8hrs for the 1st coat of tung oil to dry. That can be pretty difficult. Bottom Line: Danish Oil Wins 3. Drying TimeThe average drying time for a coat of Danish oil over a wood surface is 4hrs. But, the average drying time for tung oil is more than 8hrs. For a smooth, even finish on both, you need to apply many coats. In Danish oil, it needs at least three coats, which equates to 12 hrs. For Tung oil, the number of coats is 6. The time required will be 2 to 3 days. Based on the thickness that can go up. Bottom Line: Danish Oil Wins 4. PenetrationDanish oil has good penetration properties. It can penetrate hardwood such as mahogany, maple, cherry, oak, and ironwood. But Tung oil is not a good penetrator. Its penetration power is poor. Even for easy usage and minimal penetration, you need to add thinner and use it. Bottom Line: Danish Oil Wins 5. Food Safety: Tung Oil WinsDanish oil cures by polymerization. Over the years, various studies revealed that Danish oil is safe. But, in the absence of proper curing, it can be hazardous. It is dangerous, and appropriate curing has to be ensured. Tung oil is food safe. Bottom Line: Tung Oil Wins Danish Oil Vs Tung Oil: Similarities1. Water ResistanceBoth Danish and Tung oil provides excellent protection for the wood. Both forms a water repellent coat over the wood surface. For the wood, water can be damaging. Danish oil and Tug oil include a transparent or translucent coat over the surface. The polymerized product is water impermeable. 2. Type Of WoodYou can use both Danish and Tung oil on all types of wood. Both offer an excellent level of finish and protection for the wood. 3. Application ProcedureThe application procedure for both is also the same. You will need to sand the wood surface. After sanding, clean it, removing all the dust. After that, apply a single coat of Danish or Tung Oil and let it dry. After drying, apply the next coat. Continue till you get the required finish. Danish Oil Vs Tung Oil: Chemical CompositionThe chemical composition of Danish oil and Tung oil is different. Tung oil consists of 100% tung oil. But Danish oil differs in composition. 1. Danish OilDanish oil is a blend of different oils, resin, and varnish. Some amateur woodworkers created Danish oil. They mixed mineral spirits and varnish with linseed oil. This made the linseed oil thinner and easy to apply. This was taken advantage of by manufacturers and business people. They started producing ready-made formulation of the same. Many manufacturers have Danish oil, and each one differs in composition, thickness, etc. 2. Tung OilTung oil is produced from the nut of the tung tree. The tree is most common in China. In its pure form, Tung oil is a thick liquid. You can use it with or without thinning. Danish Oil Vs Tung Oil: How To Apply?Both Tung oil and Danish oil have similar application procedures. 1st sand and polish the wood. To ensure a smoother finish, sand up to 32p grit at least. After then, clean and buff the surface. Make sure no residues or dust there on the surface. Clean and wipe the surface with mineral solvent. After that, apply the 1st coat and leave it to dry. After drying, apply the next coat. Continue the procedure until you get the required finish. After getting the required finish clean the surface. While applying the coats, ensure that it is even and uniform. If it is uneven, sand it down and make it even. In the case of Tung oil, you will have to sand the surface after each coat to ensure a better finish. Also, to avoid excessive application of the oil, wipe it down 30 minutes after applying it. This helps to produce an even smooth finish. Danish Oil Vs Tung Oil: OverviewOverview Of Danish OilDanish oil is a wood finishing oil. You can make it by mixing linseed or tung oil (see comparison of both) with mineral spirits and varnish. Or you can buy a prepared mix from any manufacturers. Each manufacturer’s composition and thickness can vary. This is because there exists no perfect formula for Danish oil. Danish oil provides a smooth satin finish over the wood. It can penetrate the wood to enhance protection. Danish oil can penetrate even hardwood like ironwood, mahogany, etc. Danish oil can dry faster and need only three coats. Often 1 or 2 coats of Danish oil is more than enough. The average drying time for Danish oil is 4hrs. Hence, it is to use and apply again. You don’t have to wait for a long time to apply for the second or third coat. The protection offers to the wood is also great. It protects the wood from water. But the water-repelling capabilities are not stellar. Yet it does the job and protects the wood. On the plus side, it does not need much maintenance. Danish oil can penetrate the wood also. These two features make it the 1st choice for many woodworkers. Danish oil often maintains a clear, transparent finish over time. It will not yellow. Also, you can mix unique pigments or tan to produce the desired look for the finished wood. You can also apply it over polyurethane, which is handy. Furthermore, Danish oil can act as a wood primer if the need arises. But Danish oil is often considered as not food safe. Danish oil cures by polymerization while the coat reacts with air. The Danish oil reacts with oxygen to form the surface coat. If the curing process is not complete, then it can leave hazardous compounds on the surface. This makes them a severe health hazard. But, if the curing process is complete and ok, then it is safe. You can buy Danish oil from different manufacturers. Here are some:
Things We Like
Things We Don't Like
Overview Of Tung OilTung is produced from the seed of the tung tree. The tree is most common in China. Tung oil offers a transparent, deep, and golden look. You by them as 100% oil and often has to thin it to use it. The significant advantages of tung oil are water-resistant properties, food safety, looks, etc. They offer excellent water resistance. They were used by the Chinese in ships decades ago. Tung oil often creates a hard surface upon drying. The coat, even though challenging, is also elastic. This is a cool feature as it can expand and contract along with wood. The wood expands and contracts when exposed to heat and cold. Tung oil on such occasions can keep a good lookup. This is great. It offers an excellent finish. It provides a transparent golden finish. You can apply it to any type of wood. Making it ideal for any woodworkers. It polymerizes both inside and outside the wood. This helps to protect the wood from scratches, dents, and acids. It is also food-safe, which is excellent. It is a non-toxic, natural product hence safe to use with kitchen equipment. But it has many advantages. It needs a lot of time to dry. The average time for drying a single coat takes anywhere from 8 to 24hrs. Also, you need to apply more than six coats to ensure proper penetration. Being 100% oil, the penetration capacity very low. Also, storing 100% tung oil can be difficult. Protection from heat and light is a must. Exposure to both can get it ruined. It is often difficult to find 100% pure Tung oil. Most of the time, they are Danish or any other oil like linseed or teak oil. Sometimes they are thinned versions of Tung oil. Getting a pure 100% version is always difficult.
Things We Like
Things We Don't Like
FAQs1. What are the components of Danish oil?The components of Danish oil can vary according to the manufacturer. Even though it consists of different oils along with mineral solvents and varnish 2. Can you apply Danish and tung oil without sanding?Yes, you can, but it will affect the final finish. 3. Which one is easier to apply and maintain?Danish oil 4. Is Danish oil food safe?No, there are reports that it is safe. But do keep your distance for better safety. 5. Does Danish oil contain Tung oil?Some formulations of Danish oil contain Tung oil. 6. Which one offers the best finish?Tung oil. 7. What are the disadvantages of Tung oil?Need for many coats Final TalkWhich one will you choose? That is a big question. For a woodworker, the best of your creativity needs s protection. Often this protective layer can also add to the appeal. Hence choosing the right material can make a lot of difference. Danish oil is the winner. It dries faster, easy to use. It leaves a satin finish, and you can use it on any wood surface. It has excellent penetration power and excellent water resistance. Tung oil is for those who need the perfect golden finish offered by it. It is hard to apply, dries slower, and needs many coats. It is food safe and adds to the appeal a lot. It offers better protection to the wood. But the time and effort make it less appealing Via http://thehemloft.com/danish-oil-vs-tung-oil-which-is-better/ A nailer is an instrument used by many people, be it professionals, DIYers, semi or non-professionals; this tool helps to drive nails through wood and other materials. It is the most common power tool. When it comes to nailers, there are different types available, but the best we believe are Brad nailers and finish nailers. Because of how similar these nailers are in appearance, it can be challenging to choose the best one. We have compared Brad Nailer Vs Finish Nailers and written an in-depth article to help you choose the right one. Our VerdictWe prefer the brad nailer because it works well with thin wood, and after the work is done, there is no need to do wood putty. Although finish nailers are more versatile, they do not work that great on delicate wood so, the use of either nailer depends on the task/ work that you need it for. If your work is a delicate wood or thin trim, then a brad nail will do the job and vice versa. Thus knowing the task that needs to be performed is the most significant criterion for selecting between the two. Brad Nailer Vs Finish Nailers: Comparison Chart
Brad Nailer Vs Finish Nailers: Differences1. GaugeA nail gauge has the following sizes 15, 16, and 18, this means that the nailer with a higher gauge number will require a thinner nail, and the nailer with a low gauge number will require a thicker nail. The brad nailer uses an 18gauge nail while the finish nailer uses a 15/16 gauge nail; this means that the brad nailer works better for delicate work while the finish nailer can work well for challenging work. 2. UsesA Brad nailer can attach thin trims and works excellent with lightweight boards, casing, and moldings. A finish nailer is used for carpentry work like finishing furniture, and it works excellent on plywood, MDF baseboards, staircase, and other materials. 3. FlexibilityBrad nailers are less flexible, whereas finish nailers are flexible and can be used for multiple tasks. 4. SizeBrad nailers are smaller than finish nailers. 5. DesignBrad nailers only come in refined design but finish nailers come in angled and straight design. The angled design works excellently in tight spaces. 6. BlendBrad nailers thoroughly blend into the wood while finish nailers do not blend as much. 7. CostBrad nailers are cheaper while finish nailers are expensive. 8. Wood PuttyWood putty, commonly known as plastic wood, is a substance that is used to perfect imperfections. Brad nailers do not cause breakage, and using wood putty is not required, whereas finish nailers can result in breakage. Brad Nailer Vs Finish Nailers: Similarities1. BrandBoth these nailers have similar brands like PORTER-CABLE, DEWALT, Hitachi, Freeman, NuMax, Bostitch, etc. 2. Angle AdjustmentThis is a vital feature. An angle adjustment will allow us to drive the nails deeper and has long-lasting effects both Brad nailers and finish nailers has this feature. Brad Nailer Vs Finish Nailers: FeaturesFeatures Of Brad Nailer
Features Of Finish Nailers
Brad Nailer Vs Finish Nailers: OverviewOverview Of Brad NailersBard nailers are thin small diameter nails. They have the less holding capacity they gauge wire is 18inches; this tool is used for light work like woodwork trimming, stop, and hanging panels. A brad nailer, unlike other tools it shoots brads. These are thin nails. The nail size is small, thus making this tool good to do detailed tasks. Using this tool avoids the issue of breakage or tearing, and it hardly results in split molding. When you use this tool to attach trims and moldings, there is no need to use wood putty. If your doing tasks where wood splitting or visibility is the issue or if you need to do delicate nailing, then you should opt to use brad nailers. These nails range from 5/8inches to 2 ½ inches. This tool is excellent for doing lightweight tasks, minor household repair, finishing touches, etc. Brad nailers also work to hold two pieces of wood together and various finishing carpentry work. The most common uses of brand nailers are:
Things We Like
Things We Don't Like
Overview Of Finish NailersLike the name, finish nailers are used to perform finish tasks on projects, finish nailers use 15-16 inch gauge nails. The length of the nails is around 1-2.5 inches. Finish nailers are used for specific situations. They are used to put up trims and moldings. This nailer is stronger than brad nailers. Finish nailers are versatile tools. They have high capacity and strong holding power. This nailer features a straight or angular structure. The angular structure is preferred when working in tight spaces. Since these nails are significant, they can leave small holes; however, they can be covered with wood putty. The most common uses of finish nailer are:
Things We Like
Things We Don't Like
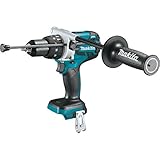
FAQs1. Can brad nails be used for trim work?Yes, brad nails can be used for lightweight trims. 2. Can I use a finish nailer for the hardwood floor?Yes, a 15-gauge finish nailer works great on the hardwood floor. 3. Which nailer should I use for crown molding?Molds are usually lightweight; hence a brad nailer can be used; however, when it comes to wide crown molding, it can be heavier, so here finish nailer would work better. ConclusionThe selection of the tool highly depends on the work that you are doing. Both brad nailers and finish nailers are great when they are used for the right tasks. Both these are powerful tools with specific functions. A brad nailer has less capacity. It is a small nail of 18-gauge that works great for lightweight, delicate tasks while a finish nailer has more capacity. The nail used is of 15/16 gauge, and they work great for hard jobs and tight spaces. Keep in mind your task. If it’s a small delicate task, then go for brad nailers. If it’s a large project, then a finish nailer is the one for you. Both these also come with tool kits, so that is also an option for you!! Via http://thehemloft.com/brad-nailer-vs-finish-nailers-which-is-better/ There is a multitude of manufacturers and companies producing power tools. Many of them are very popular and produce excellent tools. But what about Bosch and Metabo. Two German brands that have been producing power tools for decades? Which one is the best? Let’s look into the review of Bosch Vs Metabo. Our VerdictBoth Bosch and Metabo have a wide range of products. If you are looking for a prograde tool, then Bosch is the one to choose from. They make great products which offer excellent quality. They have also pioneered a lot of modern technologies. The most modern feature is the wireless charging system for batteries of power tools. But if you are in a budget, then Metabo is the right choice. Even though the price difference for Bosch and Metabo are slim, Metabo has the upper hand. They achieve such a feat by offering interchangeable parts between tools. This helps to decrease the number of such parts, which will save money in the long run. Bosch Vs Metabo: Comparison Chart
Bosch Vs Metabo: Differences1. Build QualityBosch products have been long known for their build quality. They have a wide range of products. Also, those products were well regarded for their quality. Their products have demonstrated a longer life span and better core power usage. Bottom Line: Bosch Wins 2. ErgonomicsIn ergonomics departments, Metabo has a better hand. Their tools often are the best when it comes to ergonomics. But lately, there have been complaints about their switch positioning. Bottom Line: Bosch Wins 3. WarrantyBoth the manufacturer’s offer warranty for their tools. But both are different. Bosch has a rather simpler warranty program. They offer a 1- year warranty for all their privately owned tools. Though it is short, you can expand it to 3-years. But you register the tool in their online platform within four weeks after purchasing it. In the case of domestic tools, Bosch offers a 2-year warranty period. In the case of Metabo HPT, the story is quite different. Their warranty program is often product-specific. For example, their saws and benchtop products have a 2-year warranty. But their battery-powered tools have a 5-year warranty. But their corded power tools often are covered with a basic 1-year warranty. Bottom Line: It is Tie 4. Product PortfolioBoth manufacturers have a different approach in their product design, manufacturing, and marketing. Bosch manufactures prograde power tools. But they are affordable for the performance and quality it offers. They have a wide range of products starting from impact drivers to benchtop saws and more. Bosch has a much superior high precision equipment and lasers. They also have well-priced measuring equipment that Metabo lacks. Metabo HPT also has a wide range of products. Though they lack in the measuring equipment department, they make up for it in pneumatics. They have a wide range of pneumatic nailers and staplers. Bottom Line: It is Tie 5. Long Term AffordabilityThe difference in pricing of equipment is small. But, Metabo has an edge in interchangeability. Often their products have interchangeable parts such as batteries. You can use the same batteries on many types of equipment. Make sure they meet the power requirements of the tool. Bosch does not have such a feature as of now. This can increase the cost in the long run. Bottom Line: Metabo Wins Bosch Vs Metabo: Similarities1. Product PerformanceBoth manufacturer’s tools offer similar performance. There are niche ones that often undercut the other in specific terms. Such terms being either price or performance. Tools in comparable sections usually deliver comparable performances. 2. Equipment PricingThe pricing of Bosch and Metabo are quite similar. Often for different products, there is variation. But when their large product portfolio is considered, such changes can be small. Bosch Vs Metabo: HistoryBoth power tool companies have been around for a while. Let’s dive deep into their history. BoschThe German multinational company Bosch is headquartered in Gerlingen, in Germany. Robert Bosch founded it in 1886. Their business is spread across many sectors. Such sectors are mow focused into four categories. They are mobility, consumer goods, industrial technology, and energy and building technology. Bosch started with the world’s 1st reliable low voltage magneto ignition devices. They started producing it in 1887. The improved low voltage magneto ignition devices started production in 1897. Their 1st factory was opened in 1901 in Germany. They became the supplier of ignition components for German tanks during the wars. In 1942, Robert Bosch died at age 80. Over the years, they increased their presence in various industries and manufacturing sectors. They bought shares and companies and sold some of their own. Metabo HPTMetabo is the new name of Koki Holding America. Koki Holding America was a part of the Hitachi group until 2018. They now manufacture tools under a new name in North America. The parent company of Metabo HPT, Koki Holdings Co, Ltd, partnered with KKR in 2017. This led to the transition and formation of Metabo HPT. It is the same tools but under a different name. Metabo HPT is now a brand within Koki Holdings America Ltd, under Koki Holdings Co, Ltd. Hitachi Koki started operations as the manufacturer of coal mining machinery. Later, they started producing electric power tools and pneumatic tools. In 198s, Hitachi Power Tools USA was established. From there onwards, they have been at the forefront of innovation. Over the years, they have changed operations and names. But their products and innovative features have remained the same. Bosch Vs Metabo: Standalone FeaturesBosch
Metabo
FAQs1. Which is the best brand among the two?It will depend on your priorities when you shop for a tool. For measuring and various power tools, Bosch is undeniable. But in pneumatics, Metabo is the winner. Also, the best brand can change in each product criterion. 2. Which are the cheaper ones among the two?Metabo offers the most affordable products among the two. But, for certain products, Bosch has a lower point. 3. I am looking for a quality tool. I am upgrading from the existing corded DeWalt to a cordless one. Which brand should I choose? Would I rather go for quality than affordability?If affordability is not an issue, then buy Bosch wireless tools. They are prograde et at a reasonable price. 4. Which brand offers a longer warranty for corded tools?Metabo 5. Is kickback control in Bosch’s product effective?Yes, they are. But right now, it is limited to two products only. 6. Which one has superior build quality?Bosch Final TalkChoosing a brand over another is often based on your needs. Each brand has its signature products or product categories. Often, they are the market leaders in such classes. But right now, brands have set their priority is offering value for money products. Such an adoption, in principle, is great for the buyers. They are often spoiled by the sheer number of offers from different manufacturers. If you are looking for a prograde tool, then Bosch is the one to choose from. They make great products which offer excellent quality. They have also pioneered a lot of modern technologies. But if you are in a budget, then Metabo is the right choice. Even though the price difference for Bosch and Metabo are slim, Metabo has the upper hand. They achieve such a feat by offering interchangeable parts between tools. This helps to decrease the number of such parts, which will save money in the long run. Via http://thehemloft.com/bosch-vs-metabo/ The elegance of the household depends on its furniture. Woodworkers decide the paint they would use the wood. Most woodworks are painted/stained with oil-based stains or water-based stains. These stains give the wood glamour. Now, let’s differentiate between the two types of stains by comparing Oil Based Stain Vs Water Based Stain. Our VerdictStaining is the crucial step of woodworking. Oil-based are made of a mixture of linseed and varnish. They are more durable and give a more vivid color. Water-based stain, on the other hand, is the best underwater. They have 40 different colors. In personal opinion, oil-based stains are in for the long run. They have more durability and require less maintenance. But, water-based stains are more eco friendly and release fewer toxins into the atmosphere. Oil Based Stain Vs Water Based Stain: Comparison Chart
Water Based Stain Vs Oil Based Stain: Differences1. DurabilityOil-based stain: Oil-based stains are very durable. If opened, it can be kept for one year and unopened for 2-3 years. It gives the woods more even finish. They are made-up of denatured alcohol. Water-based stain: These stains through eco-friendly have cons. they aren’t very durable as they don’t bond well with wood. They hence don’t give an excellent finish to the wood. 2. ToxicityOil-based stain: Oil-based as made of denatured alcohol and linseed releases many toxic substances to the environment. They release more VOCs [volatile organic chemicals]. They are acrylic and made of Urethane binders. Oil-based stains are water-resistant too. Water-based stain: These emit fewer VOCs than the oil-based stain. They can be cleaned with soap and water very quickly. 3. BreathabilityThe capacity of penetration depends on the type of wood, [water based stains penetrates deeply into softwoods like cypresses, cedar, etc.] Oil-based stain: Oil stains tend to have less breathability. they trap moisture. Though that is an advantage, they prevent the elements from penetrating deep into the wood. Hence their breathability is less. Water-based stain: Water-based stains don’t trap moisture. They would let wood inherit their protection. These mostly work best for less dense woods like cedar etc. 4. MildewOil-based stain: Most oil-based stains are free of mildew, some rare exceptions which would be mentioned in the tin. Water-based stain: Most water-based stains are mildew resistant. Sometimes, some producers add additives or chemicals, making them increase their mildew produce. 5. ApplicationOil-based stain: These stains are flammable. They need to apply in well-ventilated areas. They have a high rate of VOC [volatile organic chemical. Water-based stain: The application of water-based satin is easier than oil-based stains. They can be cleaned up very quickly too. But most of them raise the grain in the wood. They can be used in an enclosed area, but water-based stains aren’t durable on outdoor furniture. Bottom Line: Oil-based stains have the most advantages, mostly due to their durability. The use of the stain also depends on the type of wood, what stain was used before, and where it would be placed. If the furniture would be placed outside then, oil-based stains are better off as they’re more resistant to natural elements than water-based stains. Water Based Stain Vs Oil Based Stain: Features And Technical SpecificationsOil-Based Stain
Water-Based Stain
Accessories Contained In An Oil-Based Stain Kit:
Water-Based Stain Vs Oil Based Stain: OverviewOverview of Oil Based StainThe shine you see on any furniture is due to the staining if the furniture. Oil-based stains are the most used stains. They adapt to all conditions. They can resist all-natural elements like wind, rain, etc. They are flammable But are easy to maintain. They are more water-resistant and nature resistant as well. It gives the wood a perfect and precise finish. These stains are to protect the wood from any consequence. They are better than latex and look like the wood itself due to opacity and coloring.
Things We Like
Things We Don't Like
Overview Of Water Based StainsThey are similar to oil-based stains. They are made from dye and pigments. They have a lower odor and are easy to clean up. They work best underwater. They need to be left for more than a day or two to dry. They release fewer toxins but are messy to apply at the beginning. They can be blended in very effortlessly, and repairing them is very easy. They add right color to the wood. These are mostly used over soft and less dense woods. They are a suitable replacement for the oil-based stain.
Things We Like
Things We Don't Like
FAQs1. How do we come to what type of stain it is?The thinning of the solvent will tell if it is a water-based stain. 2. Can a roller be used for staining?Yes, a roller would do good for staining. An 18-inch roller is best to use. 3. How many coats stain can I use?The number of coats the wood absorbs is the number of quotes you can use. Typically two coats will do good. 4. Can I use a water-based stain over oil-based stain?Yes, one can use a water-based stain over the oil-based stain, but it should be fully dry before application. ConclusionThe type of stain one should use depends on the type of wood and its stained before. The stain, which has more advantages, is used abundantly. The woodwork one is aiming for is also necessary to keep the mind. It all depends on the woodworker and what he/she wants to use for the work. After all, furniture is the elegance of any household. However, things shouldn’t be judged by looks, it kind of matters in today’s world. Via http://thehemloft.com/oil-based-stain-vs-water-based-stain/ Landscaping can be a tedious job, but it has been made very easy by the weed trimmers. There are two major types of trimmers available: Automatic Trimmers and Bump Feed Trimmers. But as a customer, it can be tricky to choose between the two. Therefore, we are going to review both; Automatic and Bump Feed Trimmers. In this article, we will present a comparative study of Automatic Vs Bump Feed Trimmer. Our VerdictUndoubtedly, both types effectively cut the grass, but there is a difference in their core mechanism. After carefully evaluating the positive and negative features of both the trimmers, we have safely concluded. Each type of trimmer has its merit and demerit. So, it is advisable to have a basic idea about making a wise choice while buying. The correct thing to do is to assess our needs and buy the product accordingly. If we want a trimmer with great speed and easy maintenance, we should go for an Automatic trimmer. Whereas, if we demand more control, the Bump Feed trimmer is a better option for us. Overall, our final decision should be based on our personalized gardening needs. Automatic Vs Bump Feed Trimmers: Comparison Chart
Automatic Vs Bump Feed Trimmers: Differences1. TimeWhen it comes to a faster alternative of landscaping, Automatic trimmers are the best ones. Their super speed makes them very efficient in time management. The overall time taken by Bump Feed trimmers is more than the automatic ones. The speed of Bump Feed trimmers is effectively less due to the constant need to bump its head. The continuous impediments prove to be a bit of time taking. Also, we need to change the line repeatedly, which adds up to the amount of time taken practically in the process of gardening. Bottom Line: Automatic Trimmers are the right choice if we are looking for a faster option. 2. Line FeedingThe automatic trimmer allows us to continue trimming without worrying about the line. In the automatic trimmer, the line feeds itself. Automatic trimmers have sensors to detect the length of the line. When the length of the line gets shorter than the set parameter, it triggers a mechanism to feed more line. The most significant advantage of these trimmers is that we do not have to keep changing or adding the line, which reduces time and effort. The case is slightly different from the line in a Bump Feed trimmer. The line in a Bump Feed model does not advance on its own. It needs to be bumped on its head to get the line moving. This feature has an advantage. It provides the freedom to use line according to their requirements. Bottom Line: It seems to be a tie as the choice depends on our necessity. 3. Line ReplacementThe automatic trimmers use replaceable pre-wound spools. Although pre-wound spools are comparatively more expensive than a bulk roll of line, it compensates in time management. There is no need to rewind the spool after each use, which saves a lot of time and increases its appeal. Bump Feed trimmers use a bulk roll of line. Its mechanism allows us to change the spool. In the Bump Feed trimmers, we need to rewind the line every time it runs out. This entire process slows down the process of trimming tremendously. However, the Bump Feed trimmers make up for their lack of speed by being economical, as it is cheaper to buy the bulk roll of line. Bottom Line: This category also ends with a draw. 4. MaintenanceThe automatic trimmers are, simply put, high maintenance. The wear and tear of an automatic feed trimmer are neither easy nor cheap. The most common problems with these are the jamming of line feed, wearing down the motor, etc. It is challenging for an amateur to understand the delicate mechanism of the automatic trimmers. Hence, it is nearly impossible to fix it on our own, and bringing it to a professional may burn a big fat hole in our pockets. The Bump Feed trimmers, on the other hand, are easier to maintain. Unlike an Automatic trimmer, it has a very simplified system. Some of the usual problems in these are line jamming or damaging of spring or spool due to bumping. However, any of these problems can be detected and solved by even a novice. It is, therefore, a very low maintenance option. Bottom Line: Based on our data, Bump Feed trimmers are a clear winner in this category. 5. CostWe compared the price of both products to understand which one is more cost-effective. After our research, we understood that Automatic trimmers are cheaper to buy and also use a lot less line, which makes these economic prima facie. But we also need to replace the entire spool to replace the line, which is quite expensive. The product is, thus, less cost-effective. Whereas the Bump Feed trimmers are expensive. But these are more durable and are poor maintenance, which makes these a smart buy. The product is relatively cost-effective and is a good investment. Bottom Line: We have a clear winner that is the Bump Feed trimmers. Automatic Vs Bump Feed Trimmers: Similarities1. DesignBoth Automatic and Bump Feed trimmers resemble each other in appearance. The shaft style, mode of operation, corded or cordless design, etc., appear to be the same. It is challenging to tell the two apart just by looking at them. 2. Saves TimeAlthough, having their own merits and demerits, one thing that both types of trimmers have in common is their ability to save time. No matter which model we choose but the work is done very quickly and correctly. Automatic Vs Bump Feed Trimmers: Features And Technical SpecificationsAutomatic Trimmers Features And Technical Specifications:Many brands offer a wide range of Automatic Trimmers; however, we will discuss some of the bests in the market for your assistance. Product 1: BLACK+DECKER String Trimmer with Auto Feed
BLACK+DECKER String Trimmer with Auto Feed
Features:
Technical Specifications:
Product 2: WORX WG163.9 20V Cordless Grass Trimmer/Edger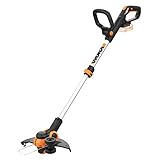
WORX WG163.9 20V Cordless Grass Trimmer/Edger
Technical Specifications:
Bump Feed Trimmers Features And Technical Specifications:While choosing Bump Feed Trimmers, customers may get confused between the variety of brands and products available in the market. To help you out with it, we are listing some best available brands of Bump Feed Trimmers here. Product 1: Stens 385-154
Sale

Stens 385-154
Technical Specifications:
Product 2: Shindaiwa 78890-30000 Speed-Feed 400 Universal Bump Feed Trimmer Head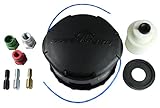
Shindaiwa 78890-30000 Speed-Feed 400 Universal Bump Feed Trimmer Head
Technical Specifications:
Product 3: Oregon 55-265 Trimmer Head Speed Feed Straight, 4-1/2″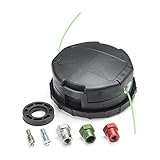
Oregon 55-265 Trimmer Head Speed Feed Straight, 4-1/2
Technical Specifications:
Automatic Vs Bump Feed Trimmers: OverviewOverview Of Automatic TrimmersAutomatic Trimmers, as the name suggests, is a fully mechanized weed cutter. It advances the line automatically. The user does not need to stop for pulling out more lines or bumping their head. There are absolutely no interruptions while working with it. The mechanism of Automatic Trimmers relies on centrifugal force to make the automatic line feed. However, the latest models come with sensors that detect the length of the line and automatically feed more. The automatic line feed makes it possible to focus on the trimming without worrying about introducing more lines to the machine. This helps the task to speed up. Line replacement, however, is expensive because most of the machines use the pre-wound spools, which is costly.
Things We Like
Things We Don't Like
Overview Of Bump Feed TrimmersThe name of Bump Feed Trimmers explains its primary mechanism. The user needs to regularly tap its head to trigger the advancement of more lines. Unlike with the Automatic Trimmer, the line on a Bump Feed model does not advance independently. Another merit of the Bump Feed is that it gives more freedom to get more lines for cutting according to the thickness or size of the grass. It is easier to maintain and repair Bump Feed Trimmer, which makes it highly affordable.
Things We Like
Things We Don't Like
Final ThoughtsElectric Trimmers are the ultimate option for landscape grooming, no matter which one we choose. The choice between the Automatic or Bump Feed model is purely a personal call. If you’re looking for a fast, hassle-free option, you must go for the Automatic Trimmer. If you want more control over the line, a more durable and cheaper option, the Bump Feed Trimmer is right for you. Whatever you choose, your landscaping desires are sure to be met. It is thus highly recommended to assess your personal need and convenience before buying. Via http://thehemloft.com/automatic-vs-bump-feed-trimmer/ What is the essential thing that goes into a toolbox? Yes, you got that right. It’s a hammer. It is one of the first things you need for basic projects. Just like the saw family, there are different types of hammers. In this article, we will see the difference between a Rotary Hammer Vs Hammer Drills. Our VerdictA rotary hammer is more resourceful than a hammer drill. It can be used for a wide range of projects in multiple ways. A hammer drill can be used for small scale projects. The rotary hammer is better for a professional or an expanding freelancer. It does not matter which hammer takes the lead here; it is essential to use the right hammers for the right job. Rotary Hammer Vs Hammer Drill Comparison Chart
Rotary Hammer Vs Hammer Drills: Differences1. ImpactBoth the hammers give out significant vibrations. They move back and forth while drilling, but the impact differs. The impact of a rotary hammer is a lot more than its counterpart. The impact caused by a hammer drill is quick but not in-depth. The hammer drill causes a lot of feedback while being used. A rotary hammer, on the other hand, can drill into heavy materials with ease. 2. Range Of ApplicationProfessionals will prefer using rotary hammers because of their strength. These hammers also have high shock-absorbing qualities. A hammer drill can be used for both screwing and drilling holes. A rotary hammer can be used to break concrete and bricks. 3. AccessoriesWe will cover this in detail in the section that focuses on accompanying accessories. Both the hammers require separate sets of accessories like nails, drills, chisels, etc. 4. Nature Of WorkWhile both the hammers can be used interchangeably, we would not advise that. What is the point of using one hammer for everything when we have specializations, right? For work like demolition or masonry drill, you should use the rotary hammer. If you need a casual hammer for home projects, DIYs, and small experiments, a hammer drill is made for you. 5. ExpenseYou guessed it right. A rotary drill will cost more because of its versatility. A hammer drill is cheap but can be put to limited use only. Rotary Hammer Vs Hammer Drills: SimilaritiesAside from belonging to the same family, hammers have very few similarities. 1. General PurposesThe common goal of a hammer is to drill into walls and concrete materials. Whether you use a rotary hammer or a hammer drill, this purpose remains the same. The only difference will be in the time taken to make a hole and the impact. 2. Essential FactorA hammer remains at the top of an ideal ‘essential toolbox.’ Any kind of hammer you own will be beneficial. If not the above two, even the necessary hand hammer will take your carpentry a long way. 3. ControlHammers are incredibly convenient to use. There is no way a hammer could go out of control (Unless you drop it on your foot, so we still advise maximum supervision) 4. AvailabilityAny kind of hammer is readily available in the market. It has been found that hammers have the most incredible variety among all tools. Makita, Milwaukee and dealt have a vast range of hammers. Top Three Rotary Hammers1. Makita HR2475 D-Handle Rotary Hammer Drill
Sale
Makita HR2475 D-Handle Rotary Hammer Drill
Makita makes some of the best hammers. They offer a wide range of hammers that you can avail from amazon.com 2. Bosch Power 11255VSR
Sale

Bosch Power 11255VSR
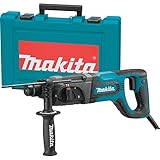
Bosch products are always reliable and have good speed. Physical appearance is a top priority for a hammer, but Bosch has great colors for their devices. 3. Bosch 11264EVS Max Combination Rotary Hammer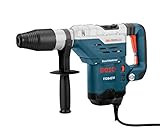
Bosch 11264EVS Max Combination Rotary Hammer
This is great for high-end projects. It can be used for renovations and mining too. It has a 360-degree handle that gives the user additional control. Top Three Hammer Drills1. Makita Brushless Cordless Hammer Drill
Sale
Makita Brushless Cordless Hammer Drill
This drill has a three-year warranty and is highly functional. It has a two-speed trigger. It is readily available on all online sites. 2. Bosch Hammer Power DrillBosch sure makes the best hammers. The warranty is lower than Makita’s, but so is the cost. It comes with three modes that are easy to access: rotation, hammer only, and rotary hammer. This is an excellent product if you are still confused between rotary and hammer drill! 3. Milwaukee Cordless Compact Hammer DrillNo products found. This bright red hammer is all you need. Milwaukee is a reputed company and comes with a five-year warranty on most products. It includes LED lights that can be used in tight corners. This, too, offers three drilling modes. It is available on amazon.com and the original Milwaukee website. Rotary Hammer Vs Hammer Drills: AccessoriesRotary HammerThese are better known in the professional carpentry and construction world. There are certain things that you need when buying a rotary hammer. As mentioned above, rotary hammers come with different attachments. These include drills, nails, and chisels. A rotary hammer can be used in three different ways. This is why there is a more critical requirement for the side accessories. You will need a clay spade, bull point chisel, scaling chisel, and a tile remover for this hammer to work its magic. These accessories are available in different sizes. So what size should you go for? That depends on the type of chuck. The SDS-Plus is a reliable type of rotary hammer chuck. It is easy to install and use. A three-jaw chuck can also be used as an alternative. Metal chucks last longer than plastic ones. All the accompanying accessories here are must-haves for a rotary hammer. This adds to the professionalism of the final product. Due to these additional costs, the overall price of a rotary hammer shoots up. In the end, it is worth it if you need a device that serves as an all-rounder. Hammer DrillsA hammer drill has fewer requirements than a rotary hammer. This caters to its nature of being a necessary hammer. However, if you invest in a high power hammer drill, the requirements are almost the same. You do not need chucks or adapters for hammer drills. Hammer drills are primary hammers in the long run. The option of adding accessories is only if you want to upgrade your hammer drill. You might need to add chisels to break up the concrete, a tile remover used for ceramic tiles and marble. You will also need a scaling chisel to help remove the rust and spatter. Once again, this is not a requirement, but it can be purchased later if you feel the need. We will always recommend you to make in-store purchases. Amazon.com is excellent, but you might miss out on certain essential things that come with the tool. Rotary Hammer Vs Hammer Drills: OverviewOverview Of Rotary HammerIf you still cannot decide which one to purchase, we hope the following section helps you. A rotary hammer is used for massive drilling and construction work. A rotary hammer serves multiple purposes.
Things We Like
Things We Don't Like
Overview Of Hammer DrillOwning a hammer drill is the first step to having an ideal toolbox. This is an essential thing you will need for any project you undertake.
Things We Like
Things We Don't Like
FAQs1. This is my first toolbox. Which hammer should I use as a beginner?As a beginner, you can use the Stanley FatMax Blacksmith Hammer. This hammer is entirely manual. You will have to purchase the necessary screws, nuts and bolts, and drills with it. If you are looking for something more renowned and slightly costly, you can buy the Claw Hammer too. 2. What are the other types of hammers?Other than the ones mentioned here, there are many different types of hammers. These are: claw hammer, ball pein, club hammer, sledgehammer, joiner’s mallet, and the soft-faced hammers. Most of the ones mentioned here are used manually. 3. If I want to do freelance carpentry, is it okay to have any hammer?Unfortunately, we will have to say no. A freelance carpenter needs to have a hammer. Like we said at the start of the article, a hammer is a must-have. Even if you do not have a power hammer, a manual one is necessary. Final ThoughtsHammers are quite a fascinating subject. They are easy to use and perform various tasks. It is essential to use the right hammer for the right job. The article says that hammers are low maintenance, but hammers have a wooden handle. Timber is susceptible to shrink in dry conditions. Another necessary caution is always to use gloves while using hammers. Via http://thehemloft.com/rotary-hammer-vs-hammer-drills/ If you are in the construction business, equipment for digging is quite essential. Both the excavator and backhoe perform the same function of digging. But it would be wise to review the category of work. In the market, there are ample alternatives, but you should carefully judge. There is variation between an excavator and a backhoe that lies in consideration of size. You need to understand the difference between shovel and spoon. The same is between excavator vs backhoes. Our VerdictThe excavators are more sophisticated and versatile in design. Heavy industries excavator over backhoes. The backhoes are simple tractors with shovel/bucket at the front and backhoe at the back. The excavators are consist of a boom, stick; cabin mounted the rotating platform, and bucket. These specially featured excavators can rightly perform heavy tasks. Therefore for heavy industries, backhoes are not recommended. Excavator Vs Backhoes: Comparison Chart
Excavator Vs Backhoes: Differences1. UseThe excavators are suitable to dig holes and trenches. Also, demolish-ion of structures is possible. They can lift heavy materials too. Due to the presence of hydraulic attachments like augers and grapples, they can work hard. Backhoes are limited to lightweight activities like firming, digging, or moving materials. Bottom Line: If the target is heavier woks, excavators are more preferable. The capacity to perform more massive tasks is possible using excavators than backhoes. 2. RotationThe excavators come with a rotating platform on which the cabin is seated. The booms, the sticks, and buckets are capable of rotating in 360 degrees. The backhoes don’t have this rotating table and consist of 200⁰ movement to left or right. Bottom Line: Excavators have a rotating table or platform. They allow the machine to reach further distance. The booms can extend easily; it is not needed to drive to the exact location. Backhoes lack this feature. 3. Trans-PortabilityThe most powerful and most significant types of excavators are more than 99200lbs in weight. As a result, need a truck or oversized trailer to be transported. Hence more costs add. The backhoes are lighter and self-driven at 25km/hr. The speed at a lower cost. Bottom Line: Whereas the backhoes enjoy a better position for being lighter in weight. 5. TravelThe excavators are usually using tracks. These tracks are either metal or rubber made, while the backhoes run on wheels. As an effect, the backhoes equipment is more prone to leave trails. Hence, damaging of topsoil is more evident for backhoes. Bottom Line: To retain topsoil, excavators are at a better position over the backhoes. Excavator Vs Backhoes: Similarities1. FunctionBoth of the equipment excavators and backhoes are entirely appropriate for construction work. 2. ServiceExcavator and backhoes perform demolition work as well as capable of digging holes 3. CabinExcavator equipment is with cabins’ helpate operation by the operator. 4. Product TypeToday a lot of small excavators similar to backhoes equipment are available. 5. ComponentBoom and stick are universally present in excavators and backhoes. Excavator Vs Backhoes: What’s In The Box?In general, excavators have three main components. These are the arm that also forms the boom, undercarriage, and the house. The undercarriage consists of a hydraulic motor and gearing to allow the driving on tracks. Today the excavator attachments like an auger, breakers, buckets, clamps, grapple, etc. Backhoes equipment is better. It comes with earth auger drive units, earth auger bits, earth anchor drive units, pallet fork. Interested in utilizing backhoes equipment to the fullest, these attachments are worth it. Excavator Vs Backhoes: OverviewOverview Of ExcavatorsTo perform heavy-duty demolitions or to dig work, the excavators are the best option. The excavator is one of the most massive pieces available for supporting construction-related work. Their weight can vary between 3500 to 200,000 pounds. The availability of the swivel feature is exceptionally beneficial for its users. Boom, stick, and bucket are capable of handling dirt around through greater distance. The 360⁰ rotation feature enables the machine to cover a greater radius. The use of hydraulic attachments like grapples and augers can ease handling excavators. The excavators are primarily used for digging trenches and holes. Besides landscaping, lifting, and demolition as well. There are various types of excavators with some special features to add to service.
The renowned brands of excavators available in the market:
Things We Like
Things We Don't Like
Overview Of BackhoesIf you need a versatile piece of earthmoving item, you can consider the backhoes equipment. Backhoe equipment is being used for agriculture, construction, and various other industrial activities. To retain the return on investment on the machine can be used for multiple purposes. In particular, backhoes loaders have unique two types of design.
The top brands of backhoes in the market are John Deere, then Caterpillar, and JCB. These brands have adopted the design features aptly for their backhoes product. Benchmarking the rating of a product depends upon a few metrics these are:
Things We Like
Things We Don't Like
FAQs1. What do I require for using excavators for lifting purposes?As a control measure of lifting operations, you should refer to the CPA/HSE document. They include guidance for lifting in construction. 2. Which equipment is better for your project, the excavator, or the backhoes?The main difference between excavators and backhoes is its size. The excavators are more massive and serve better for large projects. At the same time, backhoes are smaller and applicable for farming. 3. Which are the best excavator produce?The top 10 excavator companies of the World those produce the best excavators get listed. They are Volvo CE, Caterpillar, Doosan, Hitachi JCB, etc. 4. Which are the best backhoes brands available?The best backhoes loaders are JCB 1CXT, Caterpillar 434E, JCB 4CN, etc., are the best choices. 5. Up to what depth can a mini excavator dig?The answer is a maximum of 14 feet. Mini excavators 4000-6000lbs can dig up to 10feet. 10000 to 12000lbs mini excavators can dig holes up to 14 feet. 6. Which excavator has the most extended reach?The Volvo CE’s newly launched EC750E. This is capable of reaching up to 118 feet in height and handling 8000lb tools. The model is the longest reach excavator as of the date. Final ThoughtThe excavators are ideal for heavy industrial workloads. In contrast, backhoes are suitable for farming. Both excavators and backhoes are renowned for their piling activities. The excavators are in a better position for their 360⁰ rotation technology. The hydraulic attachments like grapple and auger make the function of excavators a better choice. At the same time, the rotation is 200⁰ for backhoes position left or right. Hence, before buying drilling equipment reviewing features is required for benefits of the purpose. Via http://thehemloft.com/excavator-vs-backhoes/ |
ABOUT USLearn about different carpentry tools, materials & building methods as well as how to set foundations, lay stairs, install beams trims, & more. ArchivesNo Archives Categories |

 RSS Feed
